This week I spent some time working through the Mozilla Developer Network’s Django Tutorial. One of the final chapters covers the process of deploying a Django application. To my disappointment, it only covered deployment to Heroku. I frequently see Nginx and Gunicorn mentioned in discussions about Django deployment, so wanted to try using these instead.
Although the setup covered in this post still isn’t ideal for production use, it’s hopefully enough to point you in the right direction. I took some shortcuts to prevent this post from being too long, but have left a summary of some suggested changes at the end of the post.
As a side note, the MDN Django tutorial was really good. If you’re interested in learning how to write Django apps, I’d recommend that tutorial rather than the one on the official Django website. However, this post only covers the deployment of Django apps, not the creation of them.
I should also mention that I tend to use CentOS as my server OS of choice. Command examples shown in this post were all executed on a CentOS 8 server.
Step 1: Creating a Python Virtual Environment
If you’re not familiar with Python virtual environments, they essentially allow you to have multiple Python environments running on the same machine. Each Python environment also has it’s own set of modules. This is useful if you’re running multiple Python apps on the same machine requiring different versions of the same module. E.g. one app may require Django 2 while the other requires Django 3.
In this case I probably don’t need a Python virtual environment, as I only run the one app, but it’s a good habit to get into regardless.
# Create the project directory
mkdir djangoproject

# Create the virtual environment
python3 -m venv ~/djangoproject/djangoenv

# Enable the virtual environment
source ~/djangoproject/djangoenv/bin/activate

# Upgrade PIP
pip install --upgrade pip
The third line in the set of commands above is where I enable the virtual environment I just created. So whenever I run python or pip from this point on, it’s running the binaries stored in ~/djangoproject/djangoenv/bin. Running “deactivate” would take me out of the virtual environment and back to using /bin/python3
Step 2: Installing Django
For the purposes of this overview, I’ve just installed Django and created a new Django Project without adding to it. This is good enough to test the basic deployment.
# Install Django
pip install django
# Initialize a new Django project
django-admin startproject djangoproject ~/djangoproject/
# Run the Django development server to test it worked
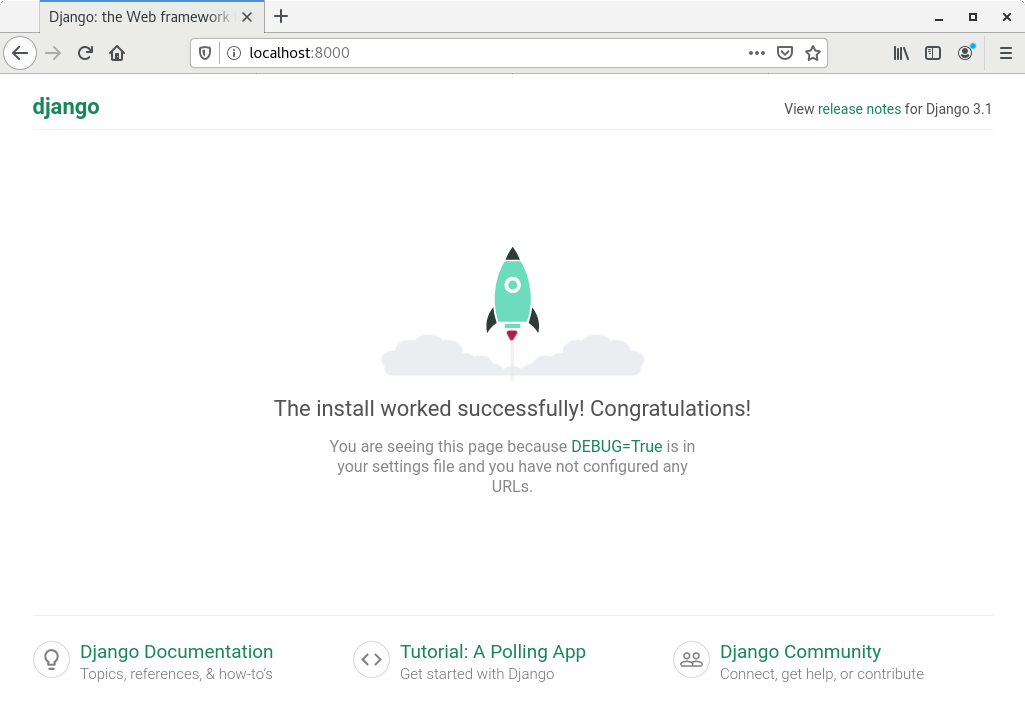
python ~/djangoproject/manage.py runserver
Now when I go to http://localhost:8000 I can see that the Django app is running:
Step 3: Installing and Testing Gunicorn
As mentioned earlier, the Django development server is not intended for production use. One common approach is to use the Gunicorn WSGI (web server gateway interface) server in it’s place.
# Install Gunicorn
pip install gunicorn

# Move into the Django project directory
cd ~/djangoproject

# Have Gunicorn listen on port 8000 and serve the Django project
gunicorn --bind localhost:8000 djangoproject.wsgi:application
The last command in the block above is telling Gunicorn to listen on port 8000. It will also translate and pass on the web requests to the Django app. http://localhost:8000 returns the same page as before, but this time served via Gunicorn rather than the Django development server.
Gunicorn sits between the web server and the Django application. Client requests for static files (images, CSS, JavaScript, etc.) can be dealt with by the web server or a CDN. Any requests for the dynamic Django content will be passed from the web server to Gunicorn.
Step 4: Running Gunicorn as a SystemD Service
If this was a production server, I wouldn’t want to have to manually restart the Gunicorn server if it crashed or after a system reboot. Thankfully, SystemD makes it really easy to create a service to do this for us.
The code block below shows the contents of my Gunicorn service file: /etc/systemd/system/gunicorn.service
[Unit]
Description=gunicorn daemon
After=network.target

[Service]
User=dean
Group=dean
Restart=on-failure
WorkingDirectory=/home/dean/djangoproject
ExecStart=/home/dean/djangoproject/djangoenv/bin/gunicorn --bind unix:/home/dean/djangoproject/gunicorn.sock djangoproject.wsgi:application

[Install]
WantedBy=multi-user.target
Notice that I’m running the service using my user account – “dean”. If this was a production server, I’d create a gunicorn account and use that instead. I would also move the Django project files out of my home directory.
Now that the service has been defined, it can be enabled (to start automatically after a reboot) and started:
sudo systemctl enable --now gunicorn.service
Step 5: Setting Up Nginx
To save some hassle, I’ve set SELinux to permissive mode at this point (setenfore 0). By default, SELinux doesn’t like the gunicorn.service trying to access files in my home directory. Given more time, I’d use the system audit logs to create an appropriate SELinux policy. That is a whole topic in itself.
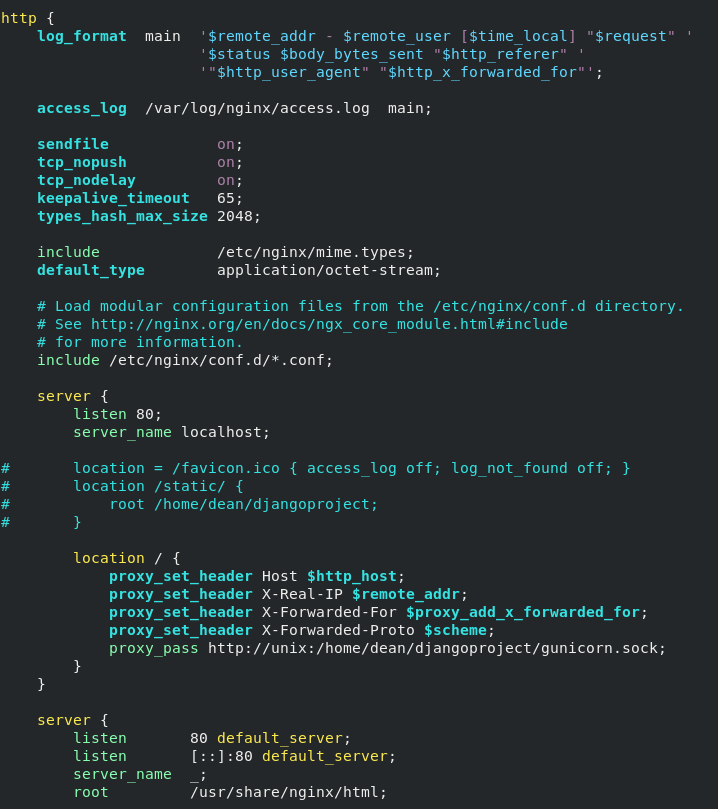
The code block below shows the partial contents of my Nginx config file. I’ve added this “server” block as the first element of the “http” block in /etc/nginx/nginx.conf
...
server {
    listen 80;
    server_name localhost;

    location / {
        proxy_set_header Host $http_host;
        proxy_set_header X-Real-IP $remote_addr;
        proxy_set_header X-Forwarded-For $proxy_add_x_forwarded_for;
        proxy_set_header X-Forwarded-Proto $scheme;
        proxy_pass http://unix:/home/dean/djangoproject/gunicorn.sock;
    }
}
...
The screenshot below gives some more context of where this fits in the Nginx config file. There are also a few extra lines that I’ve commented out. The first just prevents requests for the favicon being logged. The next two are for getting Nginx to serve Django’s static files, but that’s not something I’ve covered in this post.
Nginx is really just a reverse proxy in this example. It passes all the requests over to Gunicorn.
All that’s left to do is enable the nginx service (sudo systemctl enable –now nginx), go to http://localhost:80 and see the same webpage that we saw earlier. Exciting stuff!
Web requests hit the server. Nginx forwards them on to Gunicorn. Gunicorn forwards them on to the Django project and back comes the HTTP response.
You’ll notice that the port has changed from 8000 to 80 because Nginx is listening on port 80. The previous examples used port 8000 as this is the default port that the Django development server listens on. However, as defined in the SystemD service file, Gunicorn is now using a Unix socket to communicate with Nginx rather than a TCP/IP port, so is no longer listening on port 8000. Because Nginx and Gunicorn are both running on the same machine there is no real need for them to use a network socket to communicate with each other. The Unix socket is more efficient for this.
Finishing Up
If, like me, you’re new to deploying Django web apps, hopefully this helps get you started. Initially it felt like a lot of work to get running, but looking back over this post there really wasn’t much to it.
At the start of the post also I mentioned that this setup still isn’t ideal for production environments. Below are a few of the potential issues with using this setup in production:
- Django is not configured to serve static files. Nginx can be configured to do this or the files can be hosted and served from elsewhere
- My home directory probably isn’t the best place to store the Django project files
- The SystemD Gunicorn service could be running as a gunicorn user account with folder permissions changed accordingly (rather than running as my user)
- Rather than disabling SELinux, extra time could be taken to create a custom policy for the Gunicorn service
- Although databases weren’t covered in this post, Django should be reconfigured (djangoproject/settings.py) to use something other than SQLite
- Serve over HTTPS